Here is a sneak peek, full sized pics and step by step instructions are further down in this post:
Here is a look at the Zoo Nails where this cute monkey came from:
Let's get started!
The things needed for this tutorial:
OPI: Jade is the New Black, Suzi Loves Cowboys, Don't Pretzel My Buttons, Alpine Snow, Black Onyx.
Three sizes of dotting tools and a detail brush.
Step 1) Paint two coats of Jade is the New Black.
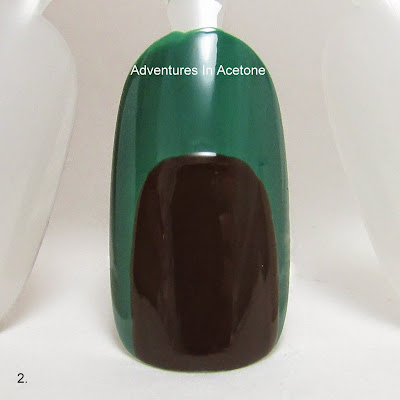
Step 2) With Suzi Loves Cowboys, use the brush in the bottle and paint a rounded rectangle 2/3 up the nail.
Step 3) Use your biggest dotting tool and Suzi Loves Cowboys to make two ear dots on the sides of the head.
Step 4) Use Don't Pretzel My Buttons and the brush inside of the bottle to make a sideways oval on the bottom half of the head at the tip of the nail. You may need two coats of this to fully cover the dark brown underneath.
Step 5) Use your detail brush and Don't Pretzel My Buttons to draw little crescent shapes inside of the ears.
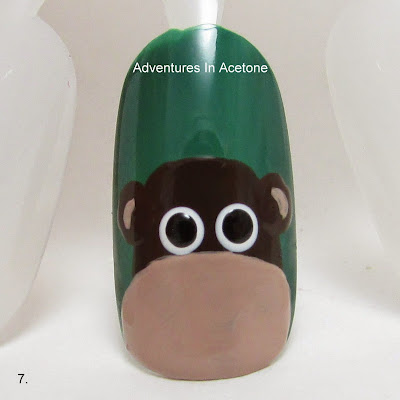
Step 6) Using your biggest dotting tool and Alpine Snow, make two dots for the eyes.
Step 7) Using your medium dotting tool and Black Onyx, make two smaller dots in the centers of the white eye dots.
Step 8) Using your smallest dotting tool and Black Onyx, make two small dots for the nostrils.
Step 9) Using your detail brush and Black Onyx, paint on a mouth. You could do any type of mouth or even don't add one at all. My original monkey didn't have a mouth but I wanted to add one today.
Don't forget to add a thick, quick drying top coat to protect and seal in your design! I prefer Seche Vite, H K Girl Top Coat, or Poshe. Put a thick bead of top coat on the brush and gently spread it toward the tips and sides, taking great care to not let the bristles touch the polish underneath. Thinner top coats can cause streaking or bleeding of the colors and the bristles drag lines through the design. YOU'RE DONE!
What do you think of this tutorial? Will you be trying it? If you try this, or any others, please share your pic on my Facebook page or tag me on instagram! I'd love to see them! Thanks for reading!


love this! his lil mouth is so cute!
ReplyDeletethis is adorable!!
ReplyDeletetutorial on the elephant please! im trying to mimic it and it is nothing coming out as desired..
ReplyDeletetutorial on the elephant please!! i;m trying to mimic the design but it is not coming out as desired.. :(
ReplyDeleteHi Liz! I actually did do an elephant tutorial as well! It's at this link:
Deletehttp://www.adventuresinacetone.com/2013/08/tutorial-tuesday-elephant-nail-art.html
Hope this helps!